How to Sew On a Button So It Actually Stays On for Years
Most tutorials leave out the one step that makes a sewn button last for years: winding a thread shank underneath so the buttonhole has room to breathe.
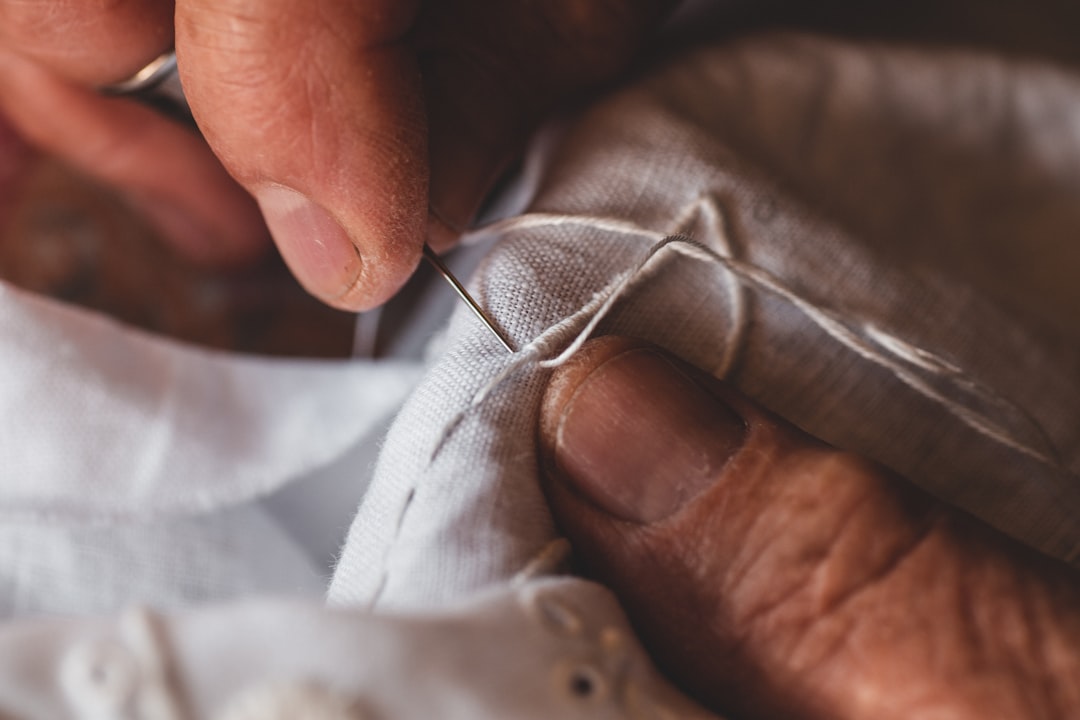
Anyone can sew a button back on. Making one stay is a slightly different job. The difference is a small pillar of thread called a shank, sitting between the button and the cloth, giving the buttonhole somewhere to breathe. Skip it and you get a flat, angry little disc that pulls the fabric tight, chafes the threads every time you do it up, and pops off again within a fortnight.
My family elder taught me the shank at about age ten, on a coat button that had already been resewn twice by my father, badly. She let me undo his work first so I could see the problem: two tight rosettes of thread crushing the wool, the buttonhole edge already fraying because the button had no room to swivel. Once you see it, you cannot unsee it.
Why buttons pop off in the first place
A button on a shirt cuff, a coat, or a pair of trousers does not sit still. Every time you fasten it, the button pivots roughly 90 degrees against the buttonhole. The threads holding it on take that torque. If the button is sewn tight against the fabric, three things happen at once. The fabric under the button compresses and eventually wears thin. The buttonhole edge saws against the thread. And the little bundle of stitches on the reverse gets stretched sideways every time, until one strand snaps and the rest unravel in about a week.
A shank of 3-6mm of exposed thread solves all three. The button lifts clear of the fabric, the hole has somewhere to pass under it, and the stitches themselves stay in line with the pull rather than being wrenched sideways. Shirt buttons need about 2-3mm because the fabric they close is thin. A wool coat button needs 6mm, sometimes a whisker more. Match the shank to the thickness of the buttonhole layer, not the button.
What you actually need
The kit is small and cheap. About £6 covers everything if you have nothing.
- Thread. Polyester all-purpose in a colour close to the existing stitching. Gutermann Sew-All is the reference in most UK haberdashers, around £2 for 100m and it lasts a decade. For coat and jacket buttons, use button thread or a doubled polyester. Cotton thread is prettier but breaks earlier.
- Needle. A sharps size 7 for shirting, size 5 for coat weights. Cheap packs of assorted sharps from John Lewis or a market stall are fine.
- Beeswax or a candle stub. Draw the thread across it once. Reduces tangles and adds a tiny bit of grip in the knot. Optional but I never sew a button without it.
- A cocktail stick, matchstick, or the shaft of a second needle. This is the shank spacer. The single item that separates a button that lasts three years from one that lasts three weeks.
- Small scissors. Nail scissors will do.
Thread length: cut about 45cm. Any longer and it tangles, knots, and frays as you pull it through the fabric. Fold it double for a four-strand hold that gets the job done in five to seven stitches instead of twelve.
The method, step by step
- Mark the position. Do the shirt up with the button next to the empty spot and put a pin or a tailor’s chalk dot exactly where the button needs to sit. Two millimetres off and the whole placket will bulge.
- Anchor with a cross, not a knot. Bring the needle up from the wrong side leaving a 3cm tail, then take one tiny stitch across the mark and back through the same hole. This X, hidden under the button, holds better than a knot and does not leave a lump you can feel through the fabric.
- Bring the needle up through the first buttonhole. Slip the button down the thread onto the fabric.
- Lay the spacer across the top of the button. A cocktail stick sits neatly between the two holes of a two-hole button, or across the diagonal of a four-hole. Sew over the top of it. This is the trick. The spacer forces the thread to travel further than it would if the button were flat to the fabric, and that extra length becomes your shank.
- Six stitches for a shirt, eight for a coat. Down through one hole, up through the other, over the spacer each time. On a four-hole button do one pair of holes first, then the other pair, so the finished pattern is two parallel bars rather than a cross. Parallel bars stress the fabric less.
- Slide the spacer out. The button now sits proud of the cloth by whatever gap the spacer made. Lift it up.
- Wind the shank. Bring the needle up between the button and the fabric but do not go through the button. Wrap the thread tightly around the loose stitches five to seven times, working from top to bottom. This binds all those strands into one solid post. This is the step most tutorials genuinely do not mention, and it is the reason your work lasts.
- Finish under the shank. Push the needle down through the wrapped shank into the fabric, then back up through it, and tie a two-loop knot on the reverse or, tidier, do three tiny buttonhole stitches into the fabric under where the button sits. Trim the ends to 3mm.
Where people get it wrong
The commonest mistake is winding the shank without first pulling the button up to the top of the stitches. If the button is still resting on the fabric when you wrap, you are wrapping fresh air. The shank has to be under tension when it forms, which means holding the button lifted with your thumb while the needle wraps underneath it. Awkward for the first two, easy by the fifth.
The second mistake is starting or ending with a big surface knot. A knot on the wrong side of a shirt pokes through and wears a hole in the placket. The anchor cross at the start and buttonhole stitches at the end are flatter and stronger. If you must knot, do it under the button where the shank hides it.
The third is thread choice. Cotton thread on a coat button will not last a British winter. If a heavy coat button keeps failing on you, switch to Gutermann Extra Strong, a button-and-carpet thread rated for upholstery. One reel does about 40 buttons and costs roughly £3.
How long it should last, and how to check
A properly shanked button on a work shirt lasts the life of the shirt, three to five years of weekly wear in my experience. On a coat, ten years is normal. The Which? clothing reports consistently note that stitching failure, not fabric wear, is what retires most garments early, and buttons are the top culprit. Test your work by doing the button up and giving it a slow, firm tug. If the shank flexes but nothing shifts, you are done. If the button rocks or the fabric puckers, undo it and redo it with a longer shank.
For sewing standards on ready-to-wear garments the industry reference is ASTM D5171, the pull test for buttons, which requires roughly 8kg of force before detachment on adult outerwear. A home-sewn shank will comfortably beat that.
FAQ
Do I need special thread for jeans or denim jackets?
Yes. Jeans buttons are usually rivets, but the fabric button on a waistband and the buttons on a denim jacket need heavy polyester or button thread, doubled. A denim button under load can snap standard cotton in under three months of daily wear. Gutherman Extra Strong or Coats Nylbond both work.
My button keeps ripping the fabric, not the thread. What now?
The fabric is worn out under the button, which is a separate problem the shank does not solve. Cut a small circle of matching lining, about the size of a 5p coin, and sew it to the wrong side of the placket first. Then sew the button through both layers. This is called a stay button or backing patch and it can add years to a favourite shirt.
Can I use a sewing machine to attach a button?
Modern machines have a button-attach foot and a specific stitch for it, but you cannot form a proper shank that way. If you use a machine, place a matchstick over the button as a spacer just as you would by hand, then remove it and wind the shank manually with a needle. For anything that gets real use, hand sewing is faster than setting the machine up.
How do I know which side of a four-hole button faces up?
It does not matter mechanically, but on shirts the convention is to sew four-hole buttons in two parallel bars rather than a cross. Parallel bars flex with the placket. Sewing in a cross pattern looks tidier but pulls the fabric into a small dimple that wears faster.
What is the fastest way if I only have five minutes before leaving the house?
Use a doubled polyester thread, no wax, four stitches over a matchstick spacer, three quick shank wraps, one knot underneath. Ninety seconds if the button is already to hand. It will not be as strong as the full method but it will outlast a hotel-room emergency kit fix by months.
Related reading
Frequently Asked Questions
Yes. Denim buttons take real load and snap standard cotton in months. Use heavy polyester or a button thread like Gutermann Extra Strong or Coats Nylbond, doubled.
Sew a small circle of matching lining (roughly the size of a 5p coin) to the wrong side of the placket first as a backing patch, then sew the button through both layers. It can add years to a favourite shirt.
Machines have a button-attach stitch but cannot form a proper shank. If you use one, place a matchstick as a spacer, then remove it and wind the shank by hand afterwards.
Mechanically it does not matter. On shirts the convention is two parallel bars of stitching, not a cross, because parallel bars flex with the placket instead of dimpling the fabric.
Doubled polyester thread, four stitches over a matchstick spacer, three quick shank wraps, one knot underneath. About ninety seconds and stronger than any hotel emergency kit fix.

Smit Sharma
Smit Sharma writes and edits Repair Habit. He is not a licensed technician of anything. What he knows about repair he picked up the ordinary way: watching his father fix things around the flat rather than throw them away, spending two summers as an apprentice in a small electronics shop, and, once he had his own place, running through the mistakes himself on his own washing machine, kettle, chairs, and car. He is a working parent, a slow buyer of new things, and a slightly obsessive maintainer of the ones he already owns. He does not believe repairing your dishwasher makes you a better person. He believes it is often the cheapest and quietest response to a small problem, which is roughly all the philosophy this site carries.
You may also like
How to Store Winter Coats So They Are Not Ruined by August
Wool coats sealed in plastic zip-bags come out of the loft smelling of loft. A slower routine that…
How to Reshape a Sweater That Stretched in the Wash
A stretched sweater is rarely ruined. Most can be restored to nearly original shape in an afternoon.

The Real Reason Your Sweaters Pill (and How to Stop It)
Pilling is not bad knitting. It is friction, and friction can be reduced once you understand where it…