How to Fix a Toilet That Runs Constantly Without Calling a Plumber
The fill valve or the flush valve seal, one of the two is always the culprit. Both cost under a fiver at Screwfix and swap out in about twenty minutes with a screwdriver and an adjustable spanner.
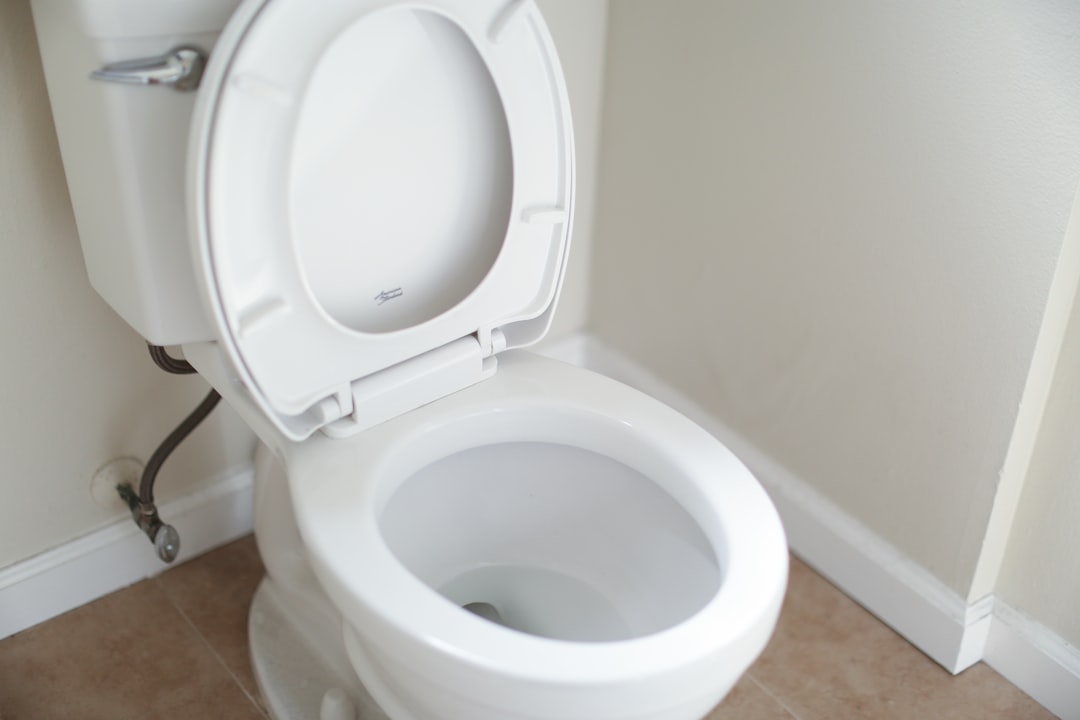
A toilet that runs constantly wastes roughly 200 to 400 litres of water a day, which shows up on your next bill and, more immediately, drives you slightly mad at 3am. The fix is almost always cheap. In every cistern I have ever opened, the offender is one of two parts: the fill valve at the side, or the flush valve seal at the bottom. Both cost under a fiver at Screwfix and take about twenty minutes to swap. The hard bit is not the repair, it is identifying which one has failed before you start unscrewing things.
Listen first, then lift the lid
Before you touch anything, stand next to the toilet and listen for thirty seconds. There are two distinct sounds and they point to different parts.
A slow, continuous hiss from the wall side of the cistern means the fill valve is not shutting off. Water is entering the tank forever because the float never rises high enough to close the inlet. You will often see the fill tube trickling into the overflow.
A trickling or gurgling from inside the bowl, with no obvious top-up in the cistern, means water is escaping past the flush valve seal at the bottom of the tank. Water leaks from the cistern into the bowl, the level drops, and then the fill valve top-up kicks in every few minutes. That is the phantom flush cycle, the classic dawn-time bathroom noise.
Then lift the lid off the cistern. Most UK ceramic lids are heavy and unattached, just lift straight up. Put it on a folded towel on the floor, not balanced on the rim, they crack easily.
Test the flush valve seal
Modern UK dual-flush toilets use a drop valve, essentially a plastic cylinder that seals against a rubber washer at the bottom of the tank. Older UK toilets use a siphon, which does not typically leak into the bowl (if a siphon fails, the toilet stops flushing rather than running). American-style toilets use the classic flapper. The test is the same for all three.
Drop a few blobs of food dye into the cistern water. Do not flush. Wait ten minutes. If dyed water appears in the bowl, the flush valve seal is leaking and needs replacing. On a Fluidmaster or Thomas Dudley drop valve, the seal is a black rubber washer at the bottom that pops on and off. On a flapper toilet, the flapper itself is the whole part.
Common causes: mineral scale buildup on the seal, hardened rubber after five to seven years, or a chain or lift wire caught underneath. Check for the last one first, it is a two-second fix and I have wasted forty minutes ignoring it.
Test and adjust the fill valve
If the dye test comes back clean, the fill valve is the problem. Look at the water level in the cistern relative to the overflow pipe. It should sit about 20 mm below the top of the overflow. If water is spilling into the overflow, the valve is not closing at the right level.
Two things to try before replacing:
- Adjust the float height. Most modern fill valves (Fluidmaster, Torbeck, Siamp) have a clip or screw on the float arm. Lower the float 10 to 15 mm, then flush and let the tank refill. Watch where it stops.
- Clean the valve diaphragm. Turn off the isolation valve, the small screw on the supply pipe under the cistern, quarter turn with a flathead. Flush to empty. Unscrew the top cap of the fill valve. Underneath is a small rubber diaphragm, often coated in limescale in hard water areas like most of the South East and East Midlands. Rinse it under the tap, refit, turn the water back on.
If neither helps, the valve needs replacing.
What the parts actually cost
Prices as of mid-2026, from a mix of Screwfix, Toolstation, and B&Q. Compare to a plumber call-out in most UK cities, which currently starts at £80 and bills a full hour minimum. The part they fit is one of the ones below.
| Part | Typical brand | Price | Fits |
|---|---|---|---|
| Fill valve, side inlet | Fluidmaster Pro 400 | £8 to £12 | Most UK cisterns |
| Fill valve, bottom inlet | Torbeck Ecofil | £10 to £15 | Older UK bottom feed |
| Drop valve seal (washer only) | Thomas Dudley Turbo 88 | £3 to £5 | Most dual-flush cisterns |
| Full drop valve unit | Fluidmaster PRO750UK | £12 to £18 | Universal dual-flush |
| Flapper (American-style) | Korky or Fluidmaster | £4 to £7 | Single-flush flapper toilets |
Fitting the replacement in twenty minutes
Ordered, for a fill valve swap (the more common of the two):
- Turn off the isolation valve under the cistern with a flathead screwdriver, quarter turn until the slot sits across the pipe.
- Flush to empty the tank. Sponge or towel out the last inch of water at the bottom.
- Undo the compression nut on the supply pipe where it meets the underside of the cistern. Hand loose, then a quarter turn with an adjustable spanner. Have a bowl ready, there will be a splash.
- Undo the large plastic backnut holding the fill valve to the cistern base. Usually hand-tight, sometimes needs pliers.
- Lift the old valve out. Compare heights with the new one and adjust the telescopic stem so the top sits at least 25 mm below the cistern rim.
- Fit the new valve, rubber washer inside the cistern, plastic nut outside. Hand tight plus a quarter turn, no more, or you will crack the ceramic. I have done this once, on a Twyford close-coupled pan a friend of the family who repairs white goods for a living ended up helping me replace the whole cistern of the next weekend. Do not overtighten.
- Reconnect the supply, turn the water back on, watch for leaks for a full minute, then flush and check the shut-off level.
For a drop valve seal, drain the tank the same way, unclip the valve body (usually a quarter twist), swap the black rubber washer, refit. No supply disconnection needed and the whole job is under ten minutes.
When it is not the usual suspects
Sometimes the diagnosis is neither. Three cases I have run into:
A hairline crack in the flush valve body itself. Water leaks past regardless of seal condition. Replace the whole unit rather than fiddling with the washer.
A dripping external overflow. On older UK cisterns fitted before around 2001, the overflow runs to a pipe outside the building. If it drips constantly onto the wall, your fill valve has failed and is spilling into the overflow rather than shutting off. Modern internal-overflow cisterns hide this inside the bowl, which is why the water bill sometimes arrives before you notice anything at all.
Water hammer on shut-off. If the fill valve makes a loud machine-gun bang when it closes, that is not the valve failing, it is supply pressure spiking. The fix is a mini pressure regulator fitted to the supply, which is genuinely a job worth calling a plumber for. Trying to solve water hammer with a new fill valve just breaks the new valve.
Which? has a decent overview of water waste from running toilets and typical repair costs at which.co.uk/reviews/toilets, and the Water Regulations Advisory Scheme covers the current UK standards for cistern fittings at wras.co.uk, worth a look if you are fitting anything unusual or replacing a whole cistern. Fluidmaster also publish fitting videos for their PRO range at fluidmaster.co.uk which are more useful than the leaflet in the box.
Related reading
Frequently Asked Questions
A slow leak past the flush valve seal wastes roughly 200 litres a day. A stuck fill valve overflowing continuously can waste 400 litres or more. On a metered supply in the UK that adds around £1 to £2 a day, so a month of ignoring it easily pays for a plumber you did not need to call.
That is the phantom flush cycle. The flush valve seal is leaking slowly into the bowl, the cistern level drops just enough to drop the float, and the fill valve tops it back up. The seal is the fix, not the fill valve. Do the food dye test to confirm.
No, they are not interchangeable. UK dual-flush cisterns use a drop valve or cartridge sized for the specific hole in the ceramic (usually 50 mm or 63 mm). Fitting a flapper needs a different valve seat entirely. Buy a like-for-like drop valve, ideally the same brand as the flush button on top of the cistern.
Most likely the isolation valve is not fully open, so the valve cannot shut properly against low flow. Fully open the isolation valve and try again. If it still hisses, check the small filter washer inside the base of the new valve for debris flushed through when you reopened the supply, that is common on older copper feeds.
Safe, yes, expensive, yes. Turn off the isolation valve under the cistern between uses if the leak is bad. Turn it back on for thirty seconds to refill before flushing. This is fiddly but stops the meter running while you wait for the replacement part to arrive.

Smit Sharma
Smit Sharma writes and edits Repair Habit. He is not a licensed technician of anything. What he knows about repair he picked up the ordinary way: watching his father fix things around the flat rather than throw them away, spending two summers as an apprentice in a small electronics shop, and, once he had his own place, running through the mistakes himself on his own washing machine, kettle, chairs, and car. He is a working parent, a slow buyer of new things, and a slightly obsessive maintainer of the ones he already owns. He does not believe repairing your dishwasher makes you a better person. He believes it is often the cheapest and quietest response to a small problem, which is roughly all the philosophy this site carries.
You may also like
How to Reseal Bath Silicone That Has Gone Black
The black is not on your bath silicone, it is inside it, and no spray will shift it.…
The Right Way to Touch Up Wall Paint
Touching up wall paint is one of those small jobs almost everybody does badly. Doing it well takes…

How to Properly Clean and Maintain Leather Shoes
Leather shoes are not delicate, but they do need quiet, regular care. Twenty minutes a month is enough.